
How to draw character portraits and scene pictures in WriteWithPaige
Paige can draw your characters, places and scenes. Draw a portrait in any Story Bible entry, draw a picture from the chat composer, turn a passage into a picture with “Visualize”, or set a book cover for your exports. Every plan gets a picture allowance; paid plans get more.
6 min readUpdated
On this page
Step by step
Step 1: Describe the character first
Open a character in the Story Bible and write how they look. Pictures are drawn from what you write.
Step 2: Tap “Draw a portrait”
The portrait takes about a minute. It lands on the entry even if you close the tab. Tap “Draw another” for a new take.
Step 3: Draw a picture in chat
In the composer, tap “Draw” (computer) or “+” then “Draw a picture” (phone). Describe it, pick a shape, choose “Include a character” if you like, then tap “Draw it (about a minute)”.
Step 4: Turn a passage into a picture
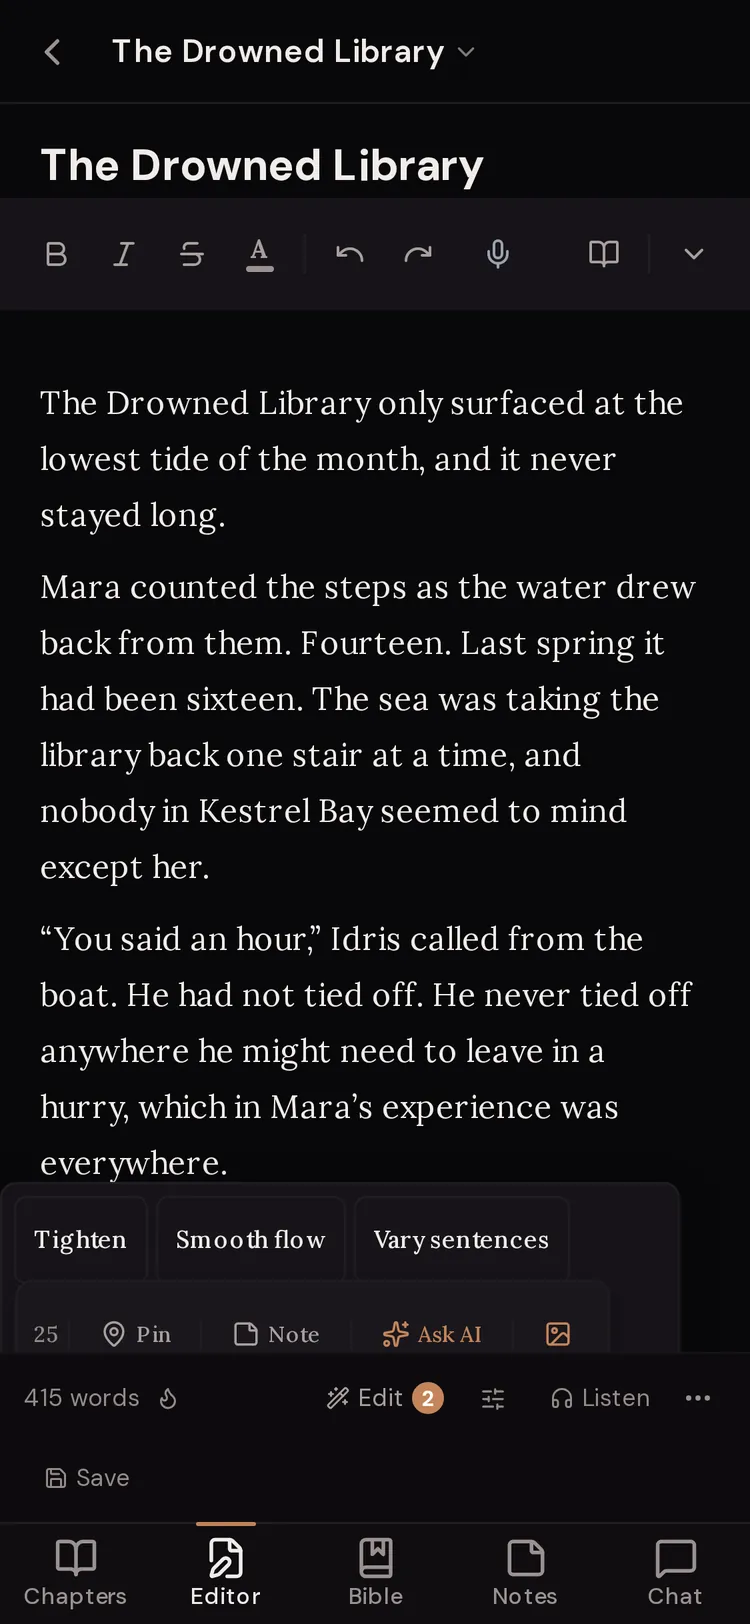
In the chapter editor, select 10 to 500 words and tap “Visualize”. The picture goes into your chapter right after the passage.
Step 5: Find every picture
Open the project’s ⋯ menu and tap “Pictures” to see every picture in the project in one place.
Step 6: Set a book cover
From the project’s ⋯ menu, tap “Book cover”, then “Upload a picture” or pick one from your book. It becomes the first page of your EPUB and PDF.

Story Bible pictures
Characters, places, items and groups can each have a picture. A character gets a portrait, a place gets a scene, an item gets an illustration and a group gets an emblem. Lore and plot arcs have no picture.
The draw button needs a description. If the entry is empty you see “Describe this character to draw a portrait, or add your own image.”
- “Draw a portrait”
- Draws the main picture from the entry’s description. Places, items and groups have the same button for their kind of picture.
- “Draw another”
- Draws a new take and replaces the main picture.
- “Add an image” / “Replace image”
- Uses your own picture (PNG, JPEG or WebP) as the main picture.
- “Add images”
- Picks several of your own pictures at once. If there is no main picture yet, the first one becomes it; the rest go in a row under it.
- “Put them in a scene”
- Characters only. Type a setting, such as on a desert road at dusk, and tap “Draw scene”. The new picture joins the row.
- “Remove”
- Removes the main picture.
Draw a picture from the chat
On a computer, tap “Draw” in the composer. It shows how many pictures you have left. On a phone, tap “+” to open “Add to your message”, then “Draw a picture”.
Describe what you want in “Describe the image you want”. Pick a shape: square, portrait or landscape. If your Story Bible has described characters, “Include a character” draws one of them as your Bible describes them. Leave it on “No one in particular” for a scene with no set character.
Tap “Draw it (about a minute)”. The picture appears in the chat. When you have none left, the button changes to “Out of images” with a link to upgrade.
Try typing
“Mara Vell on the harbour wall at dawn, salt wind in her coat, grey sea behind her”
With “Include a character” set to Mara Vell.
Try typing
“A drowned library, shelves half under green water, one lantern still burning”
A place with “No one in particular”.
Visualize a passage
Select a passage in the chapter editor, then tap “Visualize” in the toolbar (on a phone it is an icon). Select at least 10 words and at most 500.
The picture is drawn from the passage alone, so the scene in your prose is the subject. A placeholder goes into the chapter right away and turns into the picture when it is ready, about a minute later. It saves with the chapter, so closing the tab loses nothing.
Pictures in adventures
In an adventure, Paige can draw each scene in the art style you picked. The pictures button in the top bar switches between “Pictures on every scene” and “Pictures on request”. On request, tap “Illustrate this scene” under a turn. Tap “Try drawing this scene again” for a new take.
Add faces in the “You” panel under “Faces”: a portrait and a one-line look for each character. Scene pictures draw them from that look.
Free adventures come with pictures on the first scenes. Paid plans draw more scenes as you play. When a window’s pictures run out you see “This window’s pictures are used up.” You can keep playing; Paige still describes every scene.
Every picture in one place
Open a project’s ⋯ menu and tap “Pictures”, or use “Pictures” in the chat’s ⋯ menu. The window “Every picture in this project” groups them under “From your chats”, “Story Bible” and “Uploaded files”.
Tap a picture to see where it came from (“Paige drew this” or “You added this”). Tap “Go to the message” or “Open the entry” to jump there, or “Use as book cover” to make it your cover.
Your book cover
Your cover becomes the first page of your EPUB and PDF, and the picture e-readers show in your library. Open the project’s ⋯ menu and tap “Book cover”, or tap “Add a cover” in the Export window.
Tap “Upload a picture” (JPEG, PNG or WebP, up to 25 MB), or pick one under “Or use a picture from this book”. To change it, tap “Upload a new one”; to clear it, tap “Remove”. Adventures use their scene pictures instead of a book cover.
Your picture allowance
Every plan has a picture allowance that refills on the same schedule as your messages. Free has a small allowance. Plus, Pro, Ultra and Business get more, and higher plans get the most. The Draw buttons show how many you have left; a Story Bible entry shows “No pictures left for now” when you are out.
If a picture fails to draw, it is given back. You see “Could not draw that one. Your image was given back.”
What Paige will draw
Pictures are always drawn with everyone fully clothed. There is no adult picture mode.
Characters under 18 are drawn only in a wholesome, everyday way. A request that pairs a minor with anything sexual is refused, nothing is drawn and nothing is spent. You see “I can’t draw that one. Try describing the scene a different way.”
Questions
Why is “Draw a portrait” greyed out?
The entry has no description yet. Pictures are drawn from what you write, so describe the character first, or tap “Add an image” to use your own.
Can I use my own art?
Yes. “Add an image” sets your own main picture, and “Add images” adds several at once. You can also upload pictures in chat and pick them later as “Reference images”.
Will the same character look the same in every picture?
Paige draws them from their Story Bible description each time, so a clear, specific look keeps them close. Faces can still vary a little between pictures.
How many pictures can I make?
Every plan has a picture allowance that refills with your messages. Free has a small one, and paid plans get more. The Draw button shows how many you have left.
Does my book cover go into my exports?
Yes. It becomes the first page of your EPUB and PDF and the thumbnail e-readers show. You can leave it out of a single export from the Export window.
Can Paige draw explicit pictures?
No. Every picture is drawn with everyone fully clothed, and characters under 18 are only drawn in a wholesome way.
Related guides
Try it on your own story.
Start writing free