
How to use Notes, Files, bookmarks and search in WriteWithPaige
Notes are your scratchpad for research, sketches and loose ideas, with tags and file uploads. The Document Map shows the shape of the open chapter and your bookmarks. Search, or ⌘K / Ctrl+K, finds any word across your chapters, Story Bible, notes and chats.
5 min readUpdated

On this page
Step by step
Step 1: Make a note
Open “Notes” (left rail on a computer, the “Notes” tab on a phone). Tap “+” (“New note”), type a title in “Note title...” and press Enter. Write anything in the big box below.
Step 2: Tag it
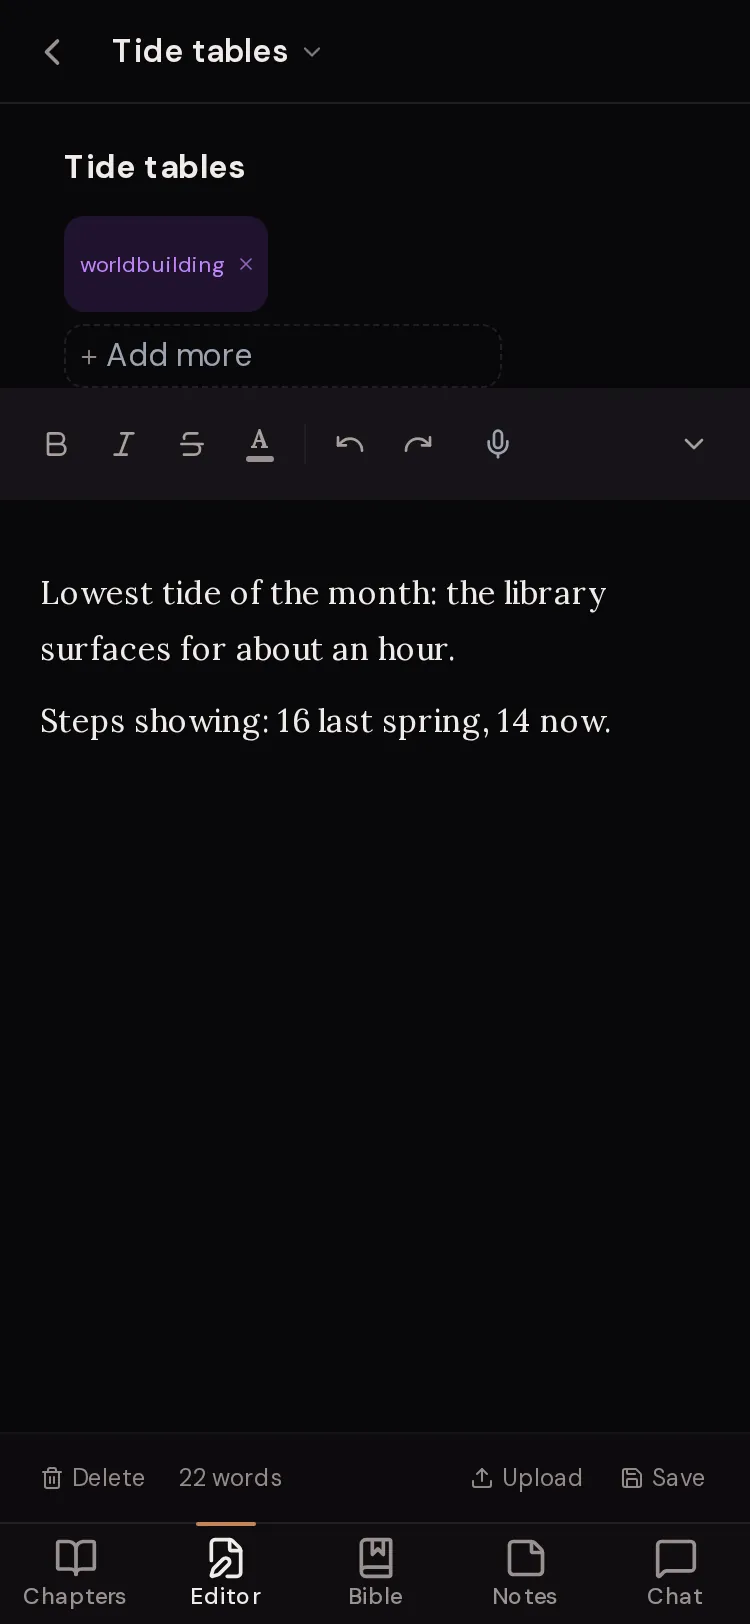
In the open note, type in “Add tag” and press Enter. Tags show as coloured chips at the top of the list, so you can filter by them later.
Step 3: Drop a bookmark in a chapter
In the editor, select a few words and tap “Pin”. Name it in “Bookmark name...” and press Enter. Find it later under “Map” on a computer, or “Document map & bookmarks” in the phone menu.
Step 4: Search everything
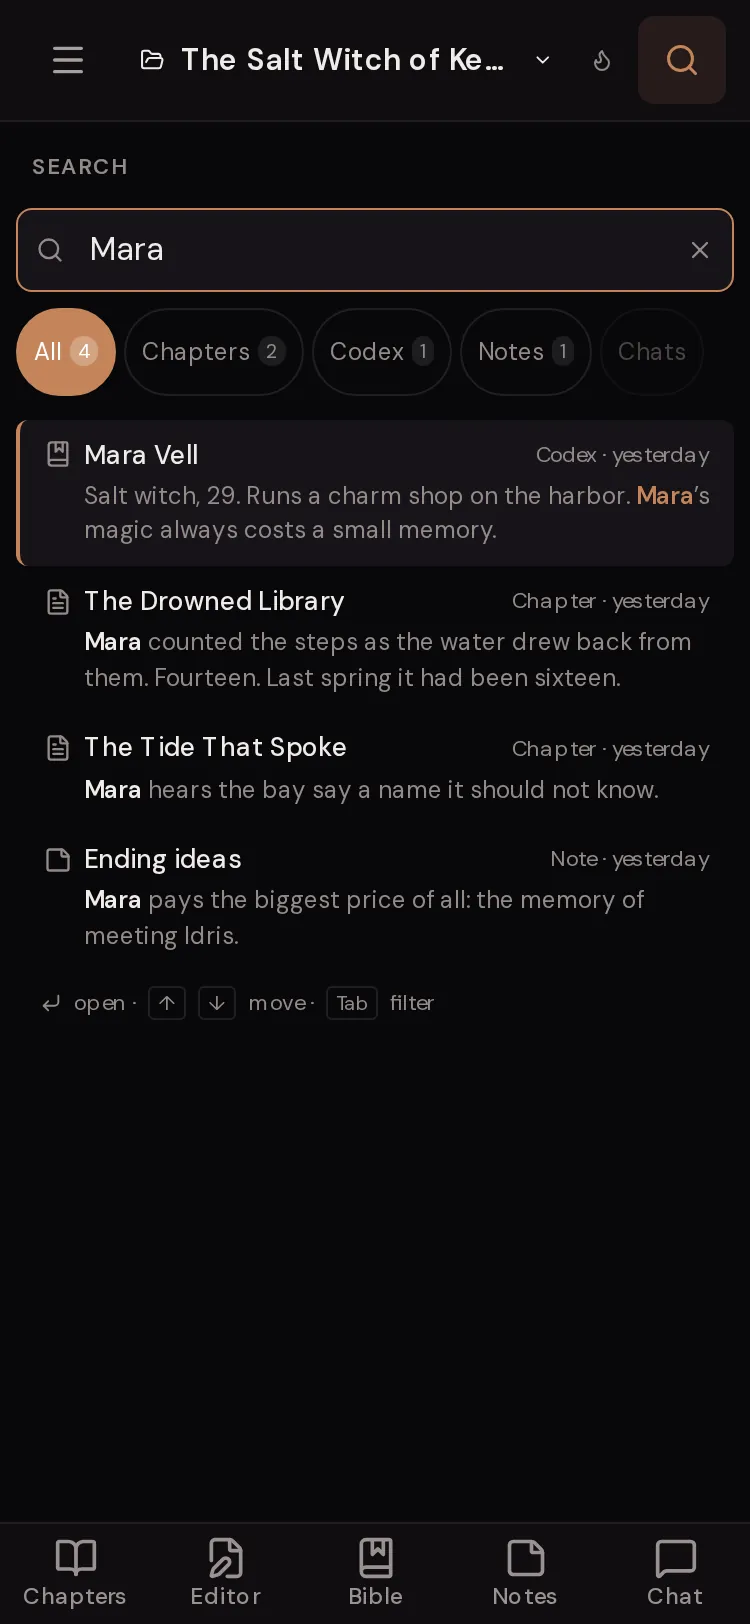
Press ⌘K (Mac) or Ctrl+K (Windows), or tap the search icon at the top of the phone screen. Type at least two letters. Pick a filter if you only want chapters, Bible entries, notes or chats.
Notes: your scratchpad
Notes belong to the project you have open. Use them for research, character sketches, timelines you are still working out, or a line you want to save for later.
The list has a “Search notes…” box, a sort menu (it only changes this list) and tag chips. Tap a tag to show only those notes. “untagged” shows notes with no tag. With many tags, tap “+ more” to see the rest.
Each note row has a ⋯ menu with “Rename” and “Delete”. You can also tick several notes to add or remove a tag on all of them at once, or delete them together.
Inside a note
A note has a title, tags and a body. The bar under it holds the tools.
- “Upload”
- Adds images or documents (.txt, .docx, .pdf), up to 10 at once. The text in a document is read into the note.
- “Focus”
- Hides everything but the note. Press Esc or tap “Exit Focus” to leave.
- Save button
- Shows “Saving...”, “Saved”, “Saved locally”, “Save failed” or “Conflict”, the same as the chapter editor. ⌘/Ctrl + S saves now.
- Bin icon (“Delete note”)
- Deletes the note after you confirm.
Exporting notes, and what deleting means
Tap the download button at the top of the Notes list (“Export all notes as Markdown”). You get one file, Notes.md, that opens in any text editor, Obsidian, Notion or Google Docs.
Deleting a note is permanent. The app asks “Crumple up this note and toss it in the bin? Gone forever.” Notes do not go to “Recently deleted” the way chapters and Bible entries do. Export first if you are not sure.
The Files panel (computer only)
On a computer, “Files” in the left rail holds documents you upload with “Upload a file”. You can drop several files at once (not whole folders).
Open a file to read it, download the “Original”, or import it. The import buttons are “Smart Import” (Paige sorts the text into chapters and Bible entries), “Import to Bible” and “Import as Chapters”. If no text could be read from a file, tap “Read the text again” or use “Re-extract text” from its ⋯ menu.
Phones have no Files panel. To bring in a manuscript on a phone, use “Import a manuscript” from the empty Chapters list or from the search palette.
Document Map & Bookmarks
Open “Map” in the left rail, or “Document map & bookmarks” in the phone menu. It shows the chapter you have open: its headings, its scene breaks (any “Divider line”) and every bookmark you made with “Pin”. Tap an item to jump there.
A long chapter with no headings is split into numbered sections so you can still move around quickly. Remove a bookmark with its X (“Remove bookmark”). If the text around a bookmark changed a lot, it is marked “moved”.
The Search panel
Open “Search” in the left rail. The box says “Search chapters, codex, notes & chats…”. Filter chips narrow the results: “All”, “Chapters”, “Codex” (your Story Bible), “Notes” and “Chats”. Your “Recent searches” show under the box, with “Clear” to wipe them.
You can type a few search tricks right into the box.
- “exact phrase” (in quote marks)
- Finds those words in that order.
- -word
- Leaves out results with that word.
- in:chats or in:codex
- Searches only chats, or only the Story Bible.
- from:paige or from:me
- In chats, finds only Paige’s messages or only yours.
- after:30d or before:2026-01
- Limits results by date.

The ⌘K / Ctrl+K palette
The palette is search in a pop-up, from anywhere in the workspace. It has the same filters and recent searches. Use the arrow keys to move, Enter to open, Tab to switch filter and Esc to close.
It also has one action: “Import a manuscript” (“Split a .docx, PDF or EPUB into chapters”). It is the fastest way to bring in a finished draft.
Questions
Can I get a deleted note back?
No. Deleting a note is permanent. Only chapters and Bible entries go to “Recently deleted”. Use “Export all notes as Markdown” if you want a backup.
Why can’t I find the Files panel on my phone?
Files is on computers only. On a phone, use “Import a manuscript” from the empty Chapters list or the search palette.
What is “Codex” in search?
It is your Story Bible. Pick “Codex”, or type in:codex, to search only your Bible entries.
Where did my bookmark go?
Bookmarks belong to a chapter. Open that chapter first, then open “Map” (computer) or “Document map & bookmarks” (phone menu).
Can I search my old chats with Paige?
Yes. Pick “Chats” or type in:chats. Add from:paige to see only her replies.
Related guides
Try it on your own story.
Start writing free