
How to write your first story with WriteWithPaige in five minutes
Sign up, tap the kind of story you want on the setup screen, and Paige writes your first chapter straight away. You read it, keep it, and tell her what happens next. Nothing in your book changes later without you seeing it first.
6 min readUpdated
On this page
Step by step
Step 1: Create your account
Sign up with your email or Google. You start on the Free plan. No card is needed.
Step 2: Tell Paige what to write
On “What should Paige write?”, type one line about your idea if you have one (“two rivals, one locked room” is plenty). Then tap the chip that fits, such as “Steamy romance”, “Dark fantasy”, “Fan fiction” or “Thriller”. Tap “Something else” for more genres.
Step 3: Already writing? Pick a path
Choose “Continue my story” to paste your last scene, or “I have a manuscript” to bring in a finished draft. “New story” takes you back to a fresh idea.
Step 4: Read your first chapter
Paige starts writing as soon as you tap. Her chapter streams into the chat while you watch.
Step 5: Keep it
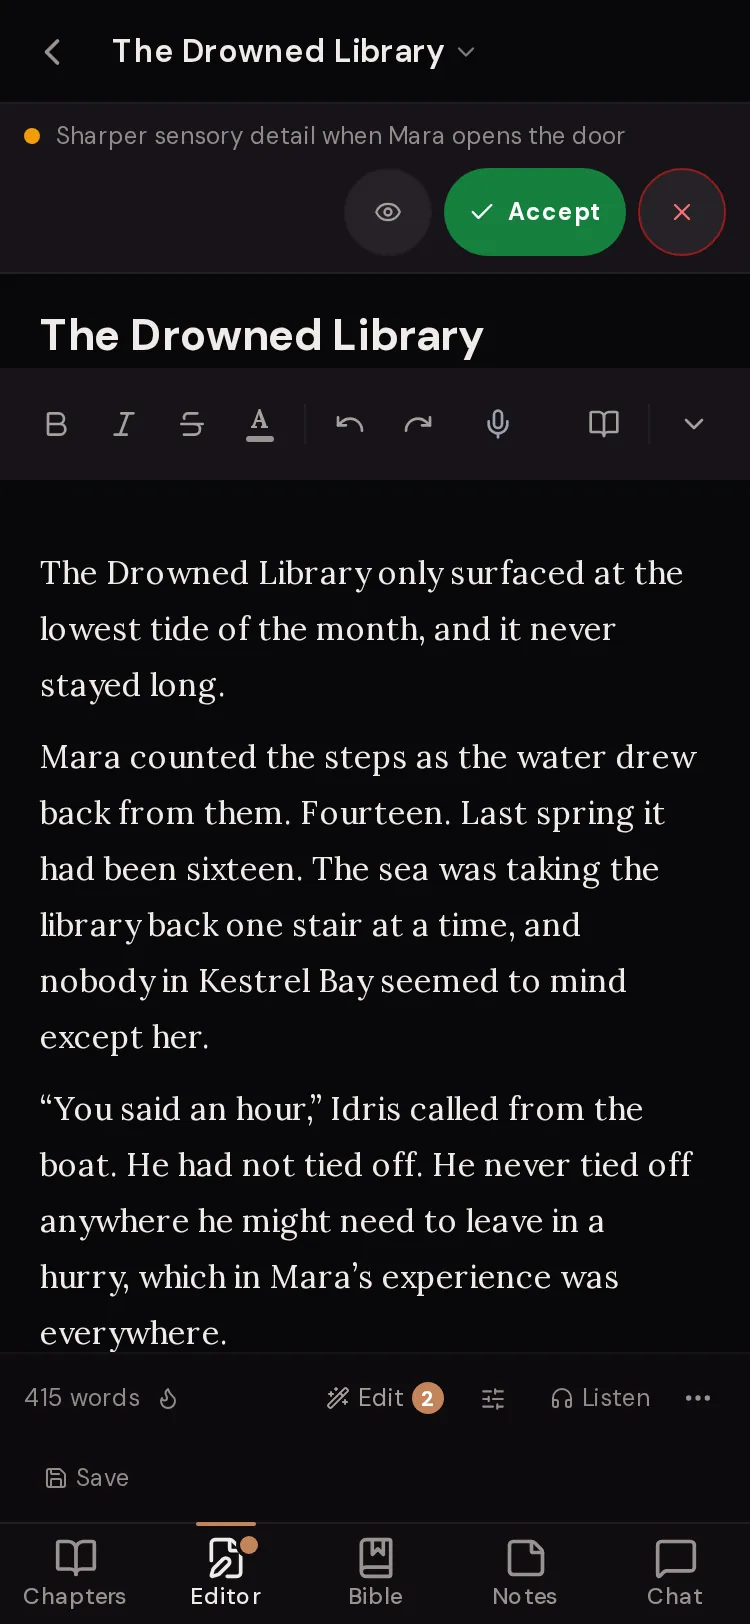
Your first chapter on a new free account is saved to your book for you, with an “Undo” button if you don’t want it. After that, new writing arrives as a draft: tap “Accept” (or “Create” for a new chapter) to keep it, or “Dismiss” to throw it away.
Step 6: Say what happens next
Type into the chat box at the bottom, for example “Write the next chapter: she finds the letter.” Leave the action bar on “Auto” and Paige works out what you mean.
What happens when you tap a chip
You see “Setting up your story…” and then “Paige is getting the first words ready.” WriteWithPaige creates a project for you, saves your idea as a “Story Direction” entry in the Story Bible (your book’s memory), and Paige writes the opening scene.
If you chose “I have a manuscript”, the import window opens next instead. Your file comes in as chapters, and Paige reads it before she suggests anything.
Your first chapter: kept for you, then drafts
On a new free account, the first chapter Paige writes is saved straight into your book. The chat shows “Saved to your book” with the chapter name and an “Undo” button. Tap “Undo” and the chapter is removed.
From then on (and always on paid plans), anything Paige writes into your book arrives as a draft. A draft is a proposed change that is not saved yet. You see a strip that says “A draft is waiting here. Nothing is saved yet”. Tap the eye button to preview it, then “Accept” to keep it or “Dismiss” to throw it away. A brand-new chapter shows “Create” instead of “Accept”.
On a phone you can also swipe a draft: right to accept, left to dismiss. Dismissing can be undone for a few seconds.

Keep going: the next five minutes
Everything happens in the chat box at the bottom. Above it is the action bar, labelled “What should Paige do?”. It starts on “Auto”: you just type, and Paige works out whether to chat, write, revise chapters or update the Bible.
Good second messages are short and concrete. Tell her what happens, whose point of view it is, and how long you want it.
Try typing
“Write the next chapter. Mara finds the captain’s letter and decides not to tell anyone.”
Auto turns this into a new chapter draft.
Try typing
“Make chapter 1 darker and cut the opening weather description.”
Auto turns this into a revision of chapter 1.
Try typing
“Who should the villain be? Give me three options, nothing written yet.”
A question gets a chat reply. Your book does not change.

What older accounts see
If your account is more than two days old and you have no project (a new browser, or you deleted your last book), you skip the setup screen. WriteWithPaige makes a project called “My First Story” and opens it, so you can start typing right away.
Rename it any time from the Projects panel. On a phone, tap the project name at the top, then “Manage Projects (rename, export…)”.
Where your writing lives
Your story is a project. Each project has chapters, a Story Bible (characters, places and rules Paige reads before she writes), notes and chats. It all saves to your account, so it is there on your phone and your computer.
Chapters save by themselves as you type. The status bar under a chapter shows “Saving...” and then “Saved”.
What to do next
Once your first chapter is in, these are the most useful next stops.
- Take the workspace tour to learn every part of the screen.
- Read how the action bar works, so you can tell Paige exactly what to do with one message.
- Open the Story Bible and check what Paige saved about your characters.
- On a phone? Read the phone guide and add WriteWithPaige to your Home Screen.
- Have a draft already? Use “I have a manuscript” or “Import a manuscript” from the empty chapter list.
Questions
Do I need to pay to start?
No. The Free plan includes a daily allowance of messages that resets every day. Paid plans give you more and add features such as voice typing and Book Report.
Can I skip the setup screen?
There is no Skip button, because tapping any chip starts your story at once. You can rename the project, change its genre and tone, or delete it later.
Paige’s first chapter isn’t what I wanted. What now?
Tap “Undo” next to “Saved to your book” to remove it, or keep it and ask for changes, for example “Rewrite chapter 1 in first person and start at the docks.”
I already have chapters written. Do I start over?
No. Choose “Continue my story” to paste your latest scene, or “I have a manuscript” to import the whole thing. Paige reads it and continues from there.
Where did my first chapter go?
It is in your chapter list. On desktop, click “Chapters” in the left rail. On a phone, tap the “Chapters” tab at the bottom.
Can I write in another language?
Yes. Write to Paige in your language and she replies in it. You can also set the “Story language” for the project in the Projects panel.
Related guides
Try it on your own story.
Start writing free