
How to create, switch and organise projects in WriteWithPaige
A project is one book or story, with its own chapters, Story Bible, notes and chats. Open the Projects panel to create, switch, rename, duplicate, file into folders or delete projects, and to set each book’s language, genre, tone and chapter style.
6 min readUpdated

On this page
Step by step
Step 1: Open the Projects panel
On desktop, click “Projects” in the left rail. On a phone, tap the project name at the top, then “Manage Projects (rename, export…)”.
Step 2: Create a project
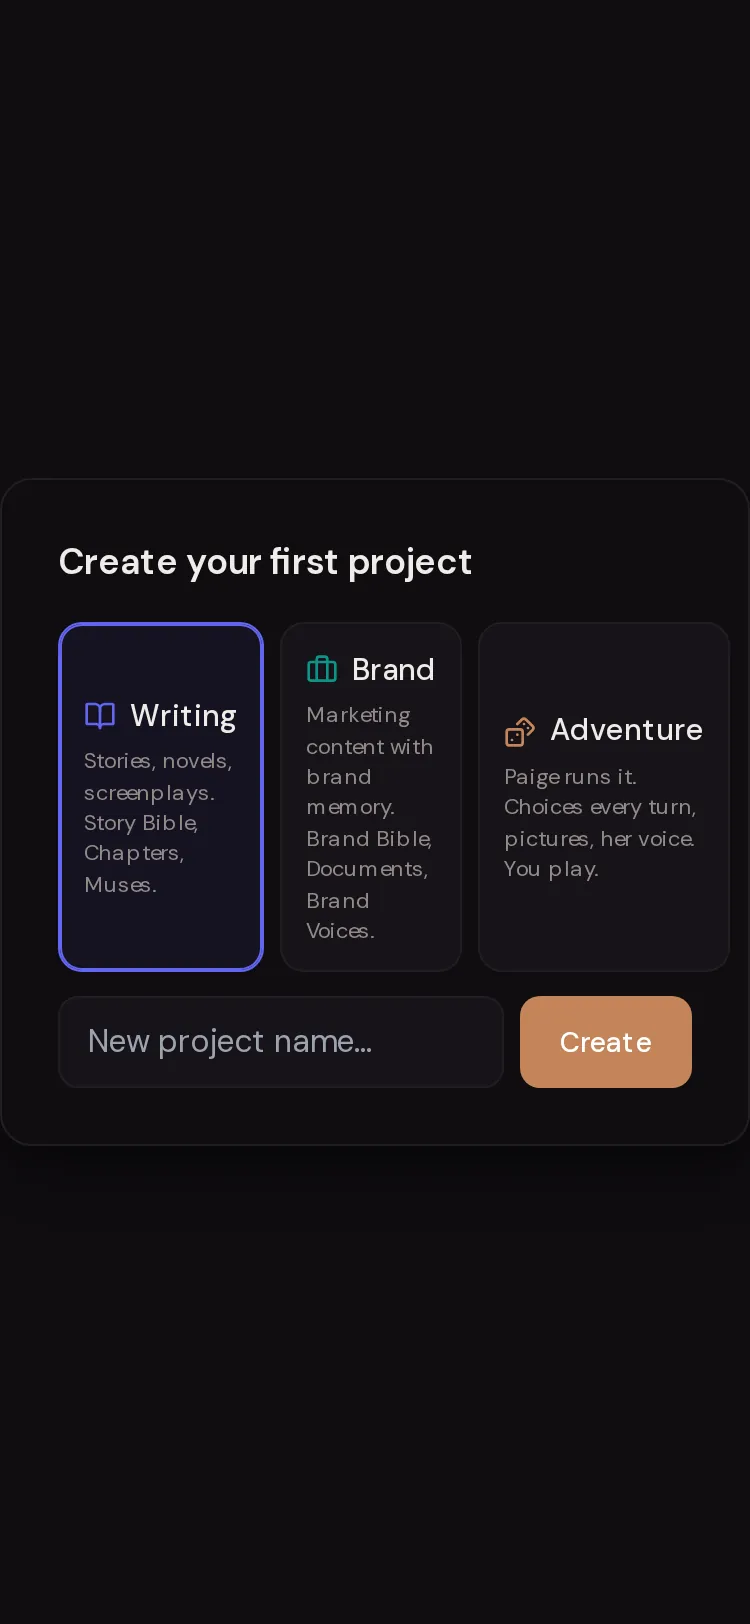
Click “New Project”. Pick “Writing” for stories, “Brand” for marketing content, or “Adventure” to play an interactive story. Type a name in “New project name…” and tap “Create”.
Step 3: Set it up
At the top of the panel, fill in “Project Name” and “Description”, then choose “Story language”, “Genre”, “Tone” and “Chapters”.
Step 4: Switch between projects
Tap any project in the “Switch Project” list. On a phone, tap the project name at the top and pick another.
Step 5: Organise with folders
Click the folder icon (“New Folder”) to make a folder. Then use a project’s ⋯ menu and “Move to folder…”, or drag it in on desktop.
Step 6: Use the ⋯ menu for everything else
Each project row has a ⋯ menu with “Rename”, “Duplicate”, “Export”, “Copy Story Bible to another project”, “Pictures”, “Book cover”, “Delete” and more.

What a project holds
Each project keeps its own chapters, Story Bible, notes, uploaded files and pictures. Chats can belong to a project, or be unassigned. The Story Bible belongs to one book only: there is no shared Bible across books. To reuse characters, copy the Bible to the other project (see below).
There are three kinds of project. “Writing” is for “Stories, novels, screenplays” with a Story Bible, chapters and Muses. “Brand” is for “Marketing content with brand memory”. “Adventure” takes you to set up an interactive story you play turn by turn.
Project settings, one by one
These sit at the top of the Projects panel and apply to the project you have open. Changes save as you make them.
- “Project Name”
- The name you see in lists and exports.
- “Description”
- A short note about the book, for you.
- “Story language”
- The language Paige writes chapters in. “Detect from my chapters” (the default) picks it up from what you have written.
- “Genre”
- Romance, Fantasy, Sci-Fi, Mystery & Thriller, Christian & Inspirational, Fanfiction or Something else. “No genre default” leaves it open.
- “Tone”
- For example “Dark & atmospheric”, “Light & witty” or “Steamy & romantic”. “No tone default” leaves it to your messages.
- “Chapters”
- “One continuous story”: each new chapter picks up where the last one ended. “Separate scenes”: each new chapter starts fresh, for collections and one-shots.
- “Paige keeps my “Story so far” summary up to date”
- When ticked, Paige keeps a running recap in your Story Bible. Untick it to lock the recap: Paige stops changing it and you can edit it by hand.
Switching projects
The “Switch Project” list shows every project, grouped by folder, with an “Unfiled” group for the rest. Click one to open it. Your chapters, Bible and chats change to that project.
On a phone, tap the project name in the header. The dropdown lists your projects plus “Manage Projects (rename, export…)” and “New Project”.
Rename, duplicate, delete
“Rename” lets you type a new name in place. Press Enter to save or Esc to cancel.
“Duplicate” makes a full copy called “Copy of” plus the name. It copies the settings, chapters with their folders, the Story Bible and notes. Use it before a big rewrite, or to try a different direction without touching the original.
“Delete” asks you to confirm with “Delete Project”. This permanently deletes all chapters, Bible entries, notes and uploaded files in that project. Chats are kept but become unassigned. If co-authors write with you, each of them keeps a copy.
Folders
Folders keep a long shelf tidy, for example “Series one” or “Drafts”. Click the folder icon next to “Switch Project”, type a name in “Folder name...” and press Enter.
To file a project, open its ⋯ menu and choose “Move to folder…” (this appears once you have a folder). “Remove from folder” takes it out. On desktop you can also drag projects into folders. Folders have their own ⋯ menu with “Move up”, “Move down”, “Rename” and “Delete”. Deleting a folder moves its projects to “Unfiled”. It never deletes them.
Copy a Story Bible or chapters to another project
“Copy Story Bible to another project” copies every Bible entry and its folders into a project you pick. Entries that already exist there are skipped, so it is safe to run more than once. Nothing in the original changes.
“Copy chapters to another project” copies every chapter and its folders. Chapters already in the other project with the same title are skipped. You can choose to put them in a folder named after the source project.
This is how you start book two with book one’s cast: create the new project, then copy the Bible from book one into it.
Questions
Is there a limit on how many projects I can have?
You can keep as many projects as you need on any plan. What changes between plans is your daily writing allowance and some features.
Can two books share one Story Bible?
No. Each book has its own. Use “Copy Story Bible to another project” to bring characters and places into a new book.
I deleted a project by mistake. Can I get it back?
No. Project deletion is permanent. Single chapters and Bible entries are different: they go to “Recently deleted” for 30 days.
What does “Separate scenes” change?
Only how new chapters start. With “Separate scenes”, a new chapter doesn’t pick up from the last one, which suits collections of one-shots. Continuing or revising a chapter works the same either way.
Paige keeps writing in English. How do I fix it?
Set “Story language” to your language in the Projects panel, and write your messages in that language too.
Why don’t I see “Move to folder…”?
It appears once you have at least one folder. Create one with the folder icon next to “Switch Project”.
Related guides
Try it on your own story.
Start writing free